You did it!
Your Squarespace site is finally live and up for the world to see.
If you’re anything like me, you’re probably feeling a huge sense of relief, but also a bit of panic over what you may have left undone before launching. So here’s 10 things to do and check after your Squarespace site is live.
1. Business and Basic Information
Your Business Information includes your business name, business address, phone number, email address, physical location, and business hours. This can be found in Settings, General, Business Information.
This is especially important to have filled out if you’re a brick and mortar store. Depending on your template, this information may even be displayed somewhere on your site.
Your Basic Information includes your site type and site description. Filling this out is helpful for SEO and certain templates will show this on your website. This can be found in Settings, Website, Basic Information.
There’s also a checkbox for allowing Squarespace promotion here too. If you check this box, you give Squarespace the right to choose to list your site as an example of the template you’ve chosen.
2. Search Engine Optimization (SEO)
If you haven’t done so already, select Heading 1, Heading 2 or Heading 3 from the text format drop-down menu to organize the structure of your content.
Search engines typically give headings a higher priority, so clear headings that describe the content that follows makes it easier for search engines to detect the major themes of your site. It also helps visitors more easily scan the page and quickly find the information they’re looking for.
Also, be sure to go into the settings for each individual page on your website and make sure you’ve completed the Page Titles and Description.
The Page Title and Description will be displayed in Google search results. To get the most bang for your buck here, try to naturally but effectively use keywords that your audience will most likely be searching for.
3. Images
A good practice for all websites it to include alt text for each image uploaded.
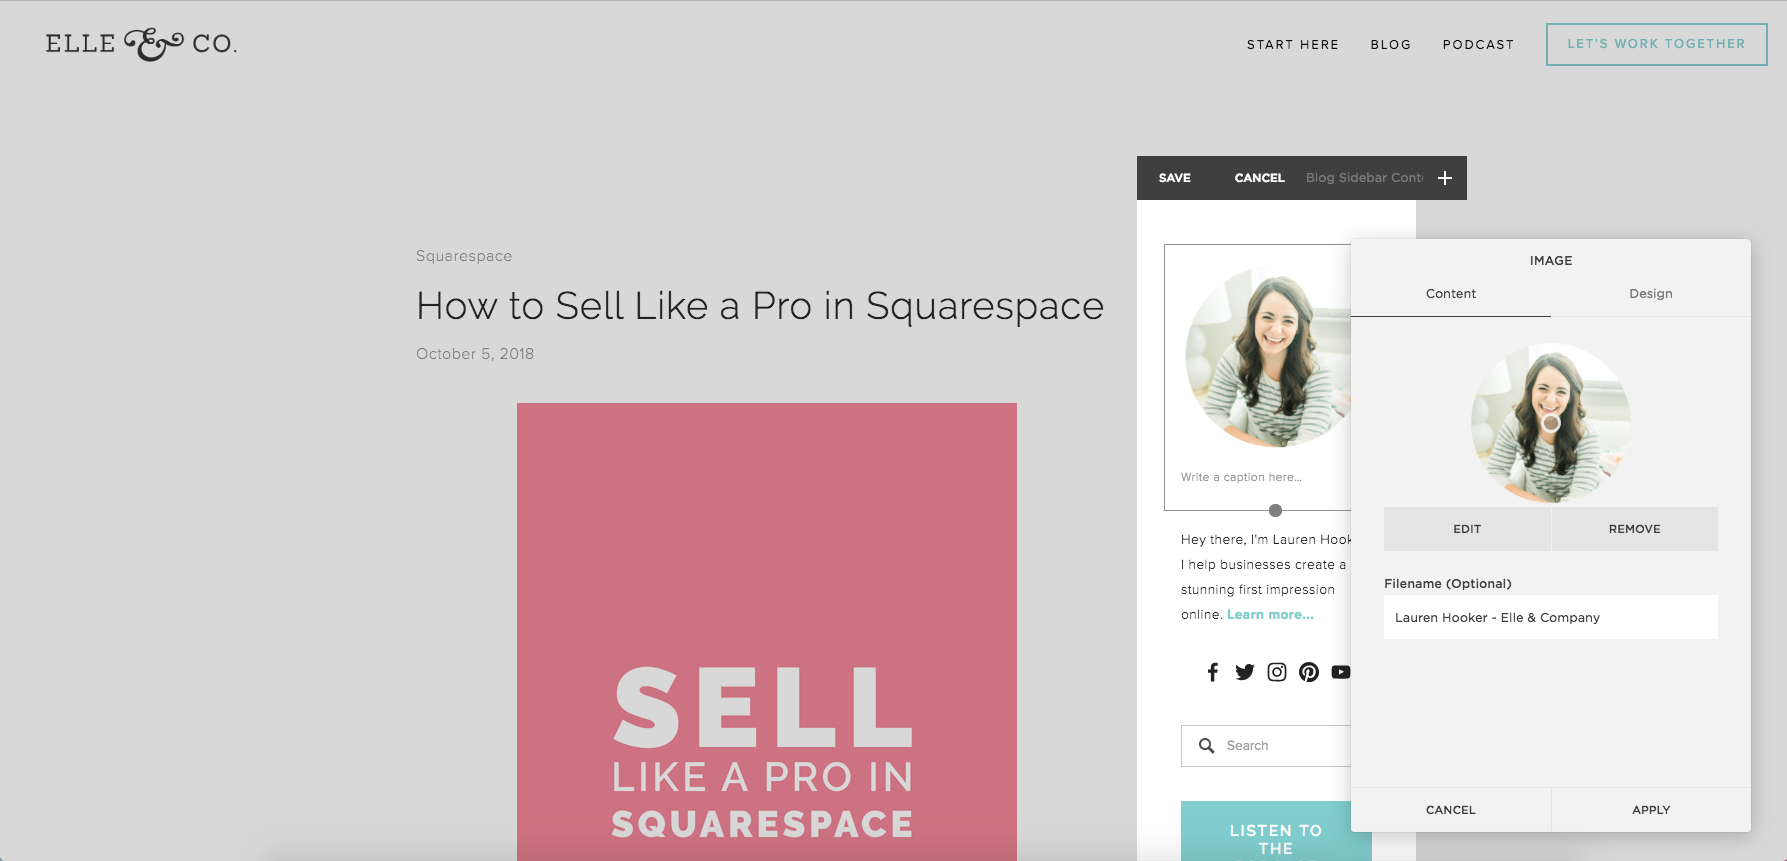
Not only does this help with SEO, but it contributes to overall good web design. The alt text (called Filename in Squarespace) will display you roll over the image, pin it to Pinterest, or for sight impaired visitors using screen readers.
When you upload an image to Squarespace you may find that Squarespace crops the image to fit “neatly” in the template or container. However, sometimes this crops the part of the image that you most wanted to display. That’s why Squarespace offers focal points, the small grey circle that appears over images you’re editing.
The focal point allows you to control the area of the image you most want in focus. All you have to do is go to the image you’d like to edit and drag the small circle to the area you’d like to highlight. This will keep Squarespace from cropping your image in the wrong place.
A favicon is the small icons that appears in browser windows and web bookmarks. If you haven’t done so already, you’ll want to upload your logo to submark as your favicon. To do this, navigate to Design, Logo & Title.
You’ll want to make sure your chose icon/image is square shaped, on a transparent background, and not too detailed (as it will be tiny).
You may also want to add a social sharing logo which you can do by navigating to Design, Logo & Title. The social sharing logo is displayed when linking/sharing your pages on your social networks.
You may want to note that Facebook and other social networks occasionally pull images from cached versions of your site. Squarespace tags the images to help the social network surface them, but the final selection of the posted image is controlled by the social network and not Squarespace.
4. Social Media
Many Squarespace templates automatically display social media icons somewhere on your website so don’t forget to connect your accounts to your Squarespace website.
This can be done by navigating to Settings, Website, Connected Accounts.
If you’d like visitors to be able to easily pin your images onto to Pinterest, you may want to consider enabling the Pin It button.
This can be done by navigating to Marketing, Pinterest Save Buttons
Here you’re able to choose if you’d like only your blog or your entire website to feature the Pin It button and dictate the design for the button.
5. 404 Page Error
Squarespace allows you to personalize your 404 Error page when someone accidentally navigates to an old or incorrect URL on your site. Creating a custom 404 page is a great way to let your visitors know what went wrong, while retaining the unique style of your site.
Your site is automatically set to use the default 404 error page. You can view this default message by navigating to Settings, Advanced.
To create a customized 404 error page, create a new page in the Not Linked section. Add your custom text and images to this page as you like. For an even more customized look, you might consider using a Cover Page to make a creative 404 error page with full-bleed images, video backgrounds, bold headlines, or buttons directing visitors back to your homepage.
Now that your new page is created, return to the 404 Error/Page Not Found panel and click the drop down menu and select the title of your custom 404 error page. When someone visits a URL that the sever can’t located, they’ll now be redirected to the custom page.
6. Add a Content Upgrade to Capture Emails
Now that your website is open for business, make the most out of each visitor by capturing their email.
If you’re a blogger or business owner offering services, you might offer a content upgrade in exchange for an email address.
If you’re a shop owner (either brick and mortar or online), you might offer a discount off the next purchase or free shipping.
By capturing email leads you gain direct access to potential customers. While a visitor may not (and probably doesn’t) come back to check your website every day, the chances they check their inbox every day are highly likely. Continue to nurture the relationship after you’ve captured their email by implementing a welcome email series, weekly newsletter, etc.
7. Remove Content from Search Engines
If search engines indexed your site before you were ready to go live, Google may be ranking your site based off old or incomplete content. You can often remove this information using Google Search Console.
If this seems a little over your head, check out my Update on Squarespace SEO in 2018 blog post to learn more about SEO and indexing.
8. Ask for Specific Feedback in the Elle & Company Facebook Group
Asking friends and family (as great as they may be) to provide feedback on your business’s website may not yield the results you want.
The Elle & Company Facebook group has over 3,000 creative entrepreneurs. Drop your website link in the Facebook group and ask your peers for specific feedback on your website.
9. Post About Your New Site on Social Media
Once you’re feeling confident enough, don’t forget to mention your website launch (or refresh) on social media.
There’s plenty of creative ways to do this. You may consider hosting a Facebook or Instagram Live walking your followers through your new website and how it will benefit them. If you host weekly or monthly podcasts or webinars, you could also walk through your process of designing or redesigning your website on these platforms.
10. Remember, Your Website is Never “Done”
Your website is a living project. Any web designer can tell you that a website is never “done” or “finished”. Come to terms with the fact that you may have gotten over a big hill by launching (or redesigning) your website, but your work will never be done.
There will be pages to add or tweak, new content to publish, and photos and images to update.


